Getting the Current User's SharePoint Group Names In - SharePoint 2010, InfoPath 2010
Since I did not write a post about SharePoint 2010 for some time, thought to write a pretty interesting post about how to get the logged in user's SharePoint group name using InfoPath functionalities. And for those who don't like to do some coding to get the thing done, they will surely like this approach. Since this is going to to be a longer post, I think it's better to go as a step by step approach, so I will start from Step 01.
Step 01.
Select the Custom List and on Ribbon under List click Customize Form. Then the List will be opening in the Microsoft InfoPath Designer 2010 .
Step 02.
Click on Manage Data Connections in InfoPath Designer. Then add two receiving data connections as following.
- First we will add a receiving data connection for web service UserProfileService.
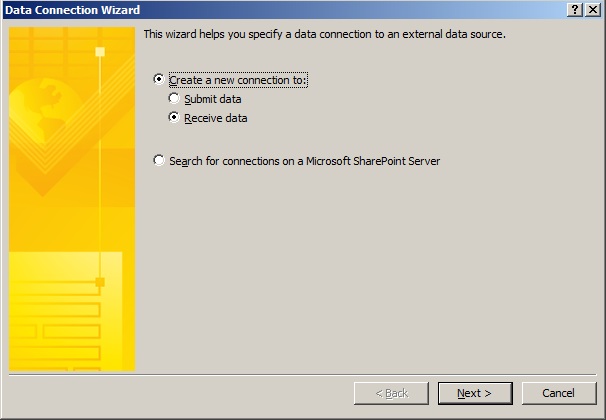
Receive Data Connection for UserProfileService
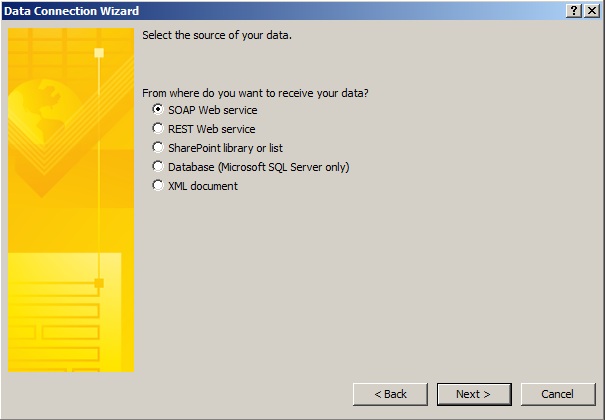
SOAP Web Service
- In the text box type, http://ServerName
/_vti_bin/UserProfileService.asmx.
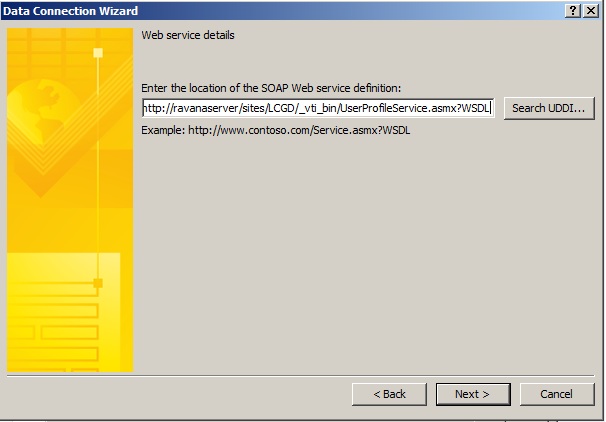
UserProfileService.asmx?WSDL
- From the list of web methods, select GetUserProfileByName.
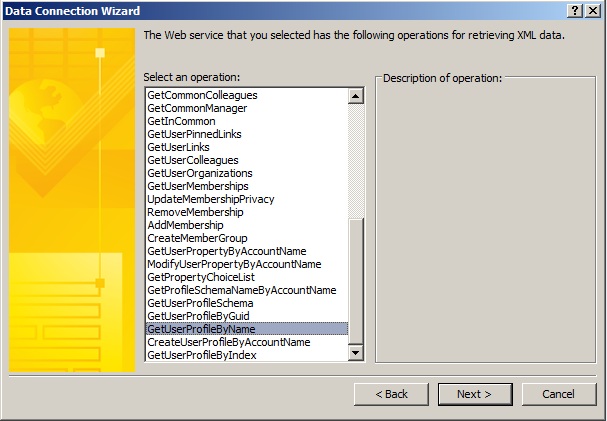
Web Method - GetUserProfileByName
- Click Next and you'll be asked for set the value for Account Name, leave it blank as doing it would get the current User.
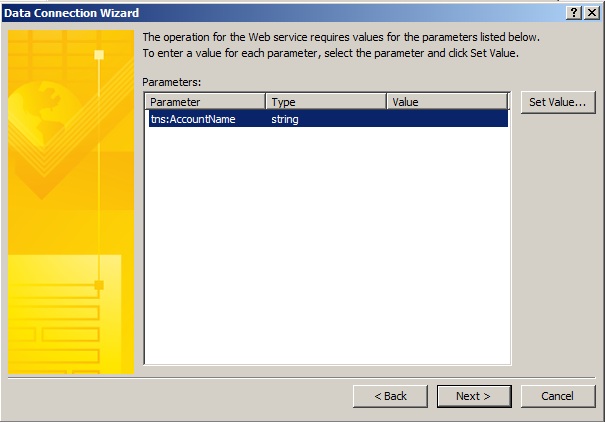
AccountName - Leave it blank
- Tick Automatically retrieve data when the form is opened.
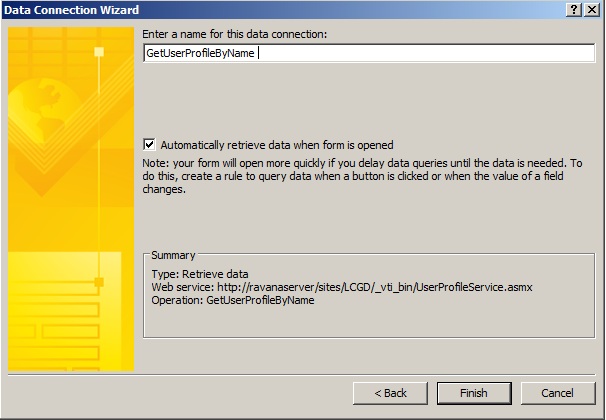
Tick - Automatically retrieve data when the form is opened
- Click Finish.
- Then let's start creating the receiving data connection for web service UserGroup.
Receive Data Connection for UserGroup
SOAP Web Service
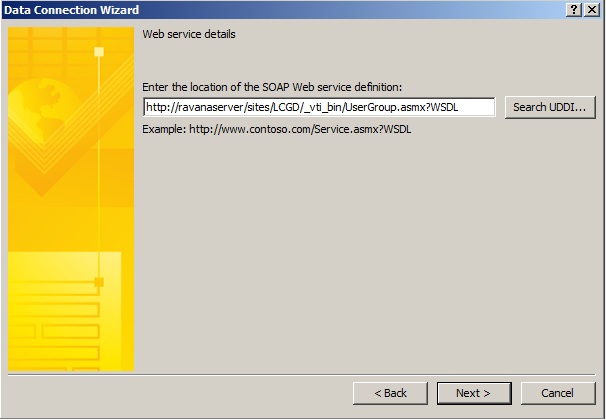
- In the text box type, http://
ServerName/_vti_bin/UserGroup.asmx.

UserGroup.asmx?WSDL
- From the list of web methods, select GetGroupCollectionFromUser.
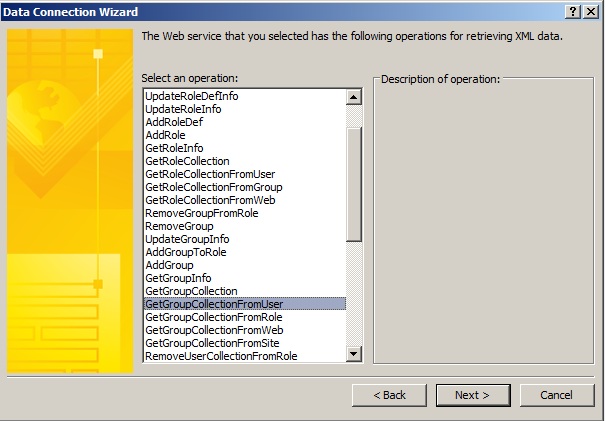
Web Method - GetGroupCollectionFromUser
- Click Next. You will be asked to set sample value for UserLoginName. In that screen click Set Sample Value and in the appearing box type domain\Administrator.
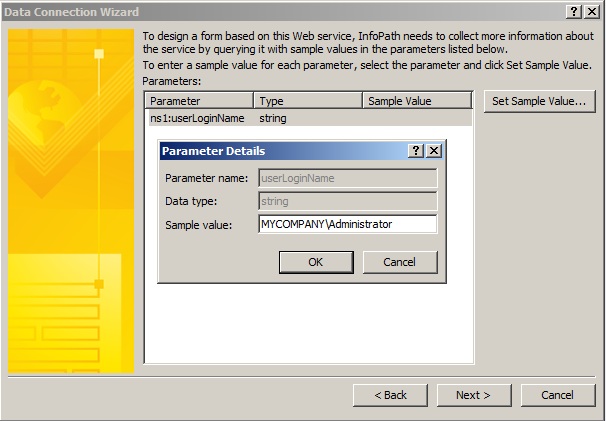
userLoginName - Domain\Administrator
- Click OK and Next. In the appearing screen Untick Automatically retrieve data when the form is opened.
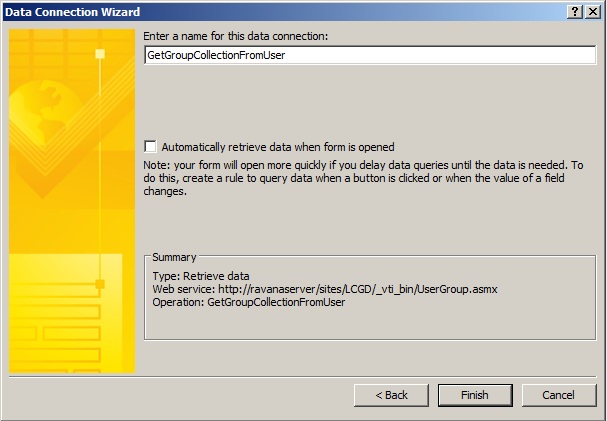
Untick - Automatically retrieve data when the form is opened
- Click Finish. Now you have successfully created two receiving data connections.
Step 03.
Now we will have to modify the xml schema for GetGroupCollectionFromUser data connection. For that we we will need to extract the InfoPath form. To extract the form, in InfoPath form go to File and Publish and then Export. Select a Folder to export the files and the form will be extracted.
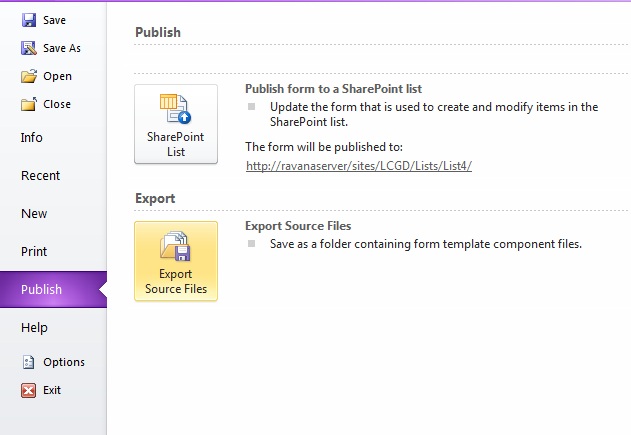
Export
Step 04.
Now when the form has finished exporting, go to the folder you have selected. You will see a list of files that has been created in Export process. But in our case we only focus on GetGroupCollectionFromUser.xsd (the xml schema for GetGroupCollectionFromUser data connection).
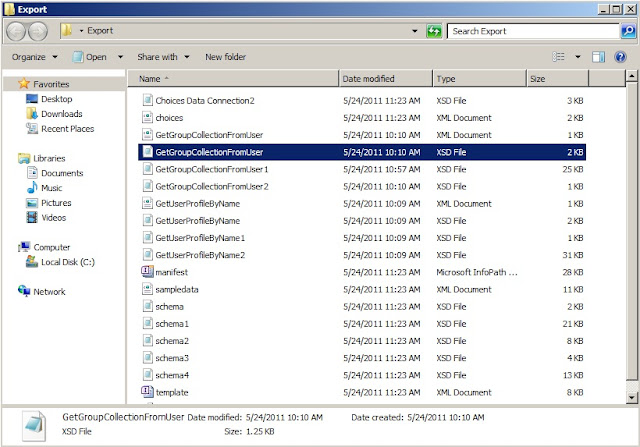
Exported Files
- First Close the InfoPath Designer. Because you can't edit files when are being used by the InfoPath designer.
- Open GetGroupCollectionFromUser1.xsd in a text editor (I prefer Notepad++) and edit it as below.
- Find the following line. Normally it's the 2nd line of the file.
<s:import namespace="http://www.w3.org/2001/XMLSchema">
- Add following below above line.
<s:complexType name="GetGroupCollectionFromUserType">
<s:sequence>
<s:element minOccurs="0" maxOccurs="1" name="userLoginName" type="s:string"/>
<s:element minOccurs="0" maxOccurs="1" name="Groups">
<s:complexType>
<s:sequence>
<s:element maxOccurs="unbounded" name="Group" >
<s:complexType>
<s:attribute name="ID" type="s:unsignedShort"></s:attribute>
<s:attribute name="Name" type="s:string"></s:attribute>
<s:attribute name="Description" type="s:string"></s:attribute>
<s:attribute name="OwnerID" type="s:unsignedByte"></s:attribute>
<s:attribute name="OwnerIsUser" type="s:string"></s:attribute>
</s:complexType>
</s:element>
</s:sequence>
</s:complexType>
</s:element>
</s:sequence>
</s:complexType>
- Find the following part.
<s:element name="GetGroupCollectionFromUser">
<s:complexType>
<s:sequence>
<s:element minOccurs="0" maxOccurs="1" name="userLoginName" type="s:string">
</s:element>
</s:sequence>
</s:complexType>
</s:element>
- Replace it with the following code.
<s:element name="GetGroupCollectionFromUser" type="tns:GetGroupCollectionFromUserType">
</s:element>
Step 05.
Now right click on the manifest.xsf and choose Design. Choose GetUserProfileByName data connection and apply rules on the PropertyData field as following.
- In Fields bar click on Show Advanced view.
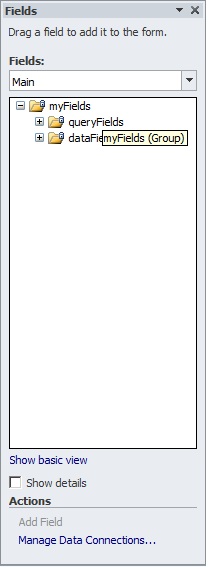
Advanced view of Fields
- Under Fields Select GetUserProfileByName (Secondary).
- Then Add a rule.
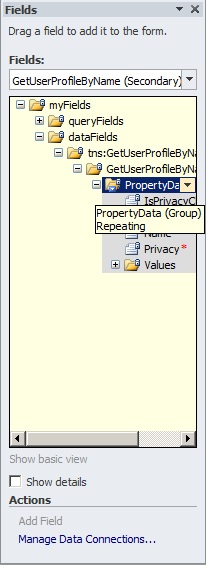
GetUserProfileByName (Secondary)
- The rule condition is Name="AccountName", rule type is Action.
Select a field or group
GetUserProfileByName - Name

Type Text
- Type "AccountName".
Type "AccountName"
- The rule actions are:
- Set field’s value. Under Field, Set Field as follows.
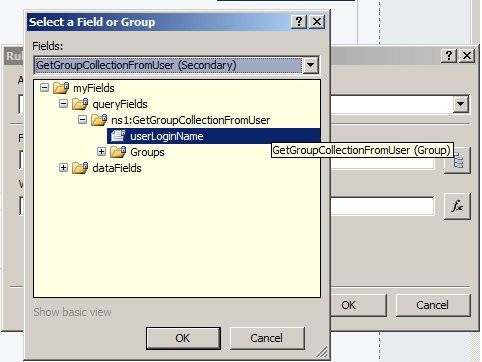
GetGroupCollectionFromUser (Secondary) - Name
- Then Under Value, Set Value as follows. Click fx and then Insert Field Or Group.
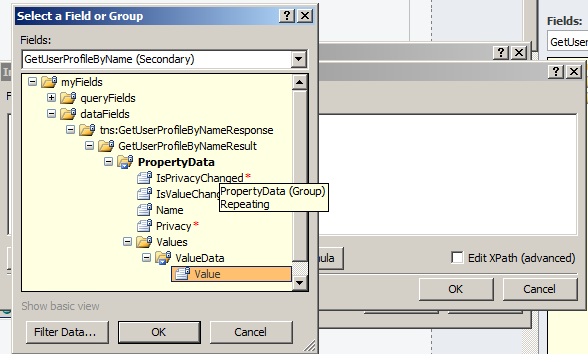
GetUserProfileByName - Value
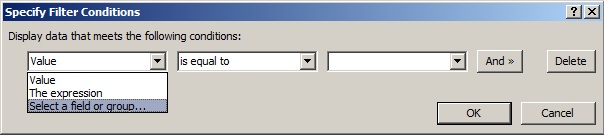
- Don't Click OK yet. Click Filter Data. The Click Add.

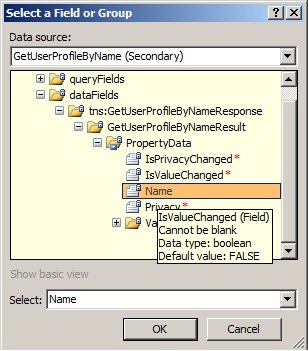
Select a field or group
GetUserProfileByName - Name
- Click OK.
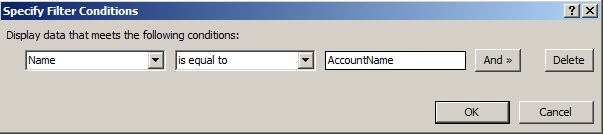
Type Text
Type "AccountName"
- Click OK. Then you will get something like this.

Complete Formula (fx)
- Click OK.
- Then add another Action. Action is Query for data from GetGroupCollectionFromUser.
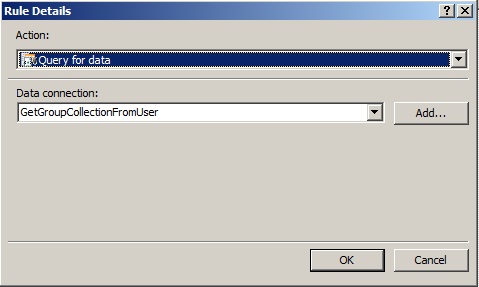
Query for data - GetGroupCollectionFromUser
- Click OK.
Step 06.
Now create a formatting rule for a field that you want to disable/hide if current user is not member of a given SharePoint Group. Put a condition as below, where the "LCGD Clerk" is the SharePoint Group Name.
Select a field or group
- Set the Name in GetGroupCollectionFromUser (Secondary Data source).
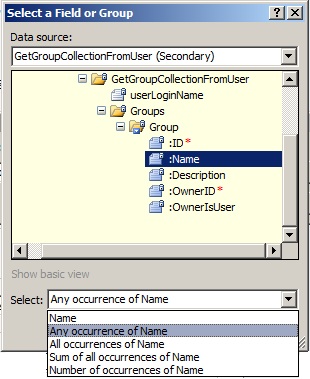
GetUserProfileByName - Any occurrence of Name

Type "LCGD Clerk" (SharePoint Group Name)
Step 07.
Now Everything is completed. Final step is Publish the form.
Step 01.
Select the Custom List and on Ribbon under List click Customize Form. Then the List will be opening in the Microsoft InfoPath Designer 2010 .
Step 02.
Click on Manage Data Connections in InfoPath Designer. Then add two receiving data connections as following.
- First we will add a receiving data connection for web service UserProfileService.
 |
| Receive Data Connection for UserProfileService |
 |
| SOAP Web Service |
- In the text box type, http://ServerName
/_vti_bin/UserProfileService.asmx.
 |
| UserProfileService.asmx?WSDL |
- From the list of web methods, select GetUserProfileByName.
 |
| Web Method - GetUserProfileByName |
- Click Next and you'll be asked for set the value for Account Name, leave it blank as doing it would get the current User.
 |
| AccountName - Leave it blank |
- Tick Automatically retrieve data when the form is opened.
 |
| Tick - Automatically retrieve data when the form is opened |
- Click Finish.
- Then let's start creating the receiving data connection for web service UserGroup.
|
| Receive Data Connection for UserGroup |
|
| SOAP Web Service |
- In the text box type, http://
ServerName/_vti_bin/UserGroup.asmx.
 |
| UserGroup.asmx?WSDL |
- From the list of web methods, select GetGroupCollectionFromUser.
 |
| Web Method - GetGroupCollectionFromUser |
- Click Next. You will be asked to set sample value for UserLoginName. In that screen click Set Sample Value and in the appearing box type domain\Administrator.
 |
| userLoginName - Domain\Administrator |
- Click OK and Next. In the appearing screen Untick Automatically retrieve data when the form is opened.
 |
| Untick - Automatically retrieve data when the form is opened |
- Click Finish. Now you have successfully created two receiving data connections.
Step 03.
Now we will have to modify the xml schema for GetGroupCollectionFromUser data connection. For that we we will need to extract the InfoPath form. To extract the form, in InfoPath form go to File and Publish and then Export. Select a Folder to export the files and the form will be extracted.
 |
| Export |
Step 04.
Now when the form has finished exporting, go to the folder you have selected. You will see a list of files that has been created in Export process. But in our case we only focus on GetGroupCollectionFromUser.xsd (the xml schema for GetGroupCollectionFromUser data connection).
 |
| Exported Files |
- First Close the InfoPath Designer. Because you can't edit files when are being used by the InfoPath designer.
- Open GetGroupCollectionFromUser1.xsd in a text editor (I prefer Notepad++) and edit it as below.
- Find the following line. Normally it's the 2nd line of the file.
<s:import namespace="http://www.w3.org/2001/XMLSchema">
- Add following below above line.
<s:complexType name="GetGroupCollectionFromUserType">
<s:sequence>
<s:element minOccurs="0" maxOccurs="1" name="userLoginName" type="s:string"/>
<s:element minOccurs="0" maxOccurs="1" name="Groups">
<s:complexType>
<s:sequence>
<s:element maxOccurs="unbounded" name="Group" >
<s:complexType>
<s:attribute name="ID" type="s:unsignedShort"></s:attribute>
<s:attribute name="Name" type="s:string"></s:attribute>
<s:attribute name="Description" type="s:string"></s:attribute>
<s:attribute name="OwnerID" type="s:unsignedByte"></s:attribute>
<s:attribute name="OwnerIsUser" type="s:string"></s:attribute>
</s:complexType>
</s:element>
</s:sequence>
</s:complexType>
</s:element>
</s:sequence>
</s:complexType>
- Find the following part.
<s:element name="GetGroupCollectionFromUser">
<s:complexType>
<s:sequence>
<s:element minOccurs="0" maxOccurs="1" name="userLoginName" type="s:string">
</s:element>
</s:sequence>
</s:complexType>
</s:element>
- Replace it with the following code.
<s:element name="GetGroupCollectionFromUser" type="tns:GetGroupCollectionFromUserType">
</s:element>
Step 05.
Now right click on the manifest.xsf and choose Design. Choose GetUserProfileByName data connection and apply rules on the PropertyData field as following.
- In Fields bar click on Show Advanced view.
 |
| Advanced view of Fields |
- Under Fields Select GetUserProfileByName (Secondary).
- Then Add a rule.
 |
| GetUserProfileByName (Secondary) |
- The rule condition is Name="AccountName", rule type is Action.
 |
| Select a field or group |
 |
| GetUserProfileByName - Name |
 |
| Type Text |
- Type "AccountName".
 |
| Type "AccountName" |
- The rule actions are:
- Set field’s value. Under Field, Set Field as follows.
 |
| GetGroupCollectionFromUser (Secondary) - Name |
- Then Under Value, Set Value as follows. Click fx and then Insert Field Or Group.
 |
| GetUserProfileByName - Value |
- Don't Click OK yet. Click Filter Data. The Click Add.
 |
| Select a field or group |
|
| GetUserProfileByName - Name |
- Click OK.
|
| Type Text |
|
| Type "AccountName" |
- Click OK. Then you will get something like this.
 |
| Complete Formula (fx) |
- Click OK.
- Then add another Action. Action is Query for data from GetGroupCollectionFromUser.
 |
| Query for data - GetGroupCollectionFromUser |
- Click OK.
Step 06.
Now create a formatting rule for a field that you want to disable/hide if current user is not member of a given SharePoint Group. Put a condition as below, where the "LCGD Clerk" is the SharePoint Group Name.
|
| Select a field or group |
- Set the Name in GetGroupCollectionFromUser (Secondary Data source).
 |
| GetUserProfileByName - Any occurrence of Name |
 |
| Type "LCGD Clerk" (SharePoint Group Name) |
Now Everything is completed. Final step is Publish the form.


 , select


